A workaround for connecting Mountain Duck to Google Drive accounts
Why does this happen?
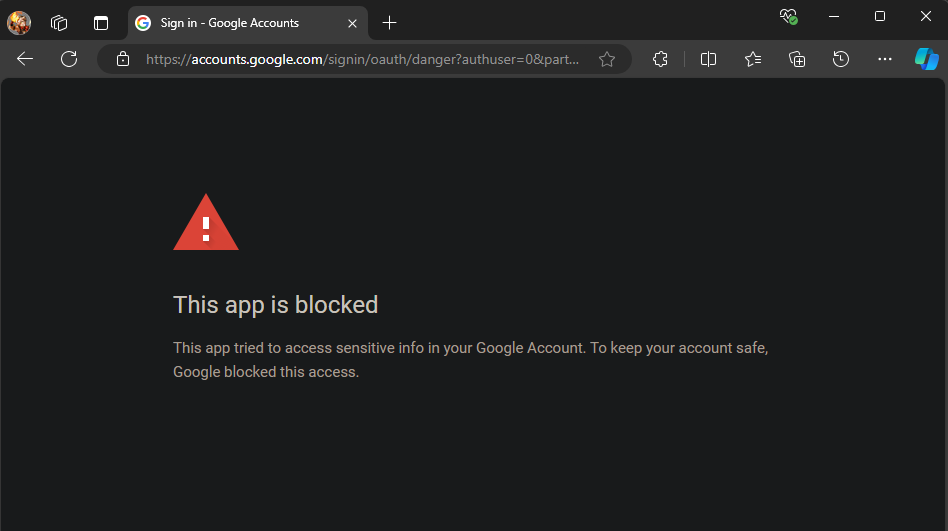
As dkocher (contributer) commented in the issue Appication blocked by Google for OAuth Flow of CyberDuck repository, the block happen when the developers cannot obtain CASA assessment in time.
For now, all we can do is wait. As a workaround, the developers have posted some documentations, but I find it hard to follow. So this is my step-by-step guide to create custom Google Drive OAuth Client ID.
Update: The problem is now resolved. This post stays here in case of similar problem occurs again.
OFFICIAL workaround from developers
The developers of Mountain Duck have released a detailed documentation: Setup a Custom OAuth Client ID for Google Drive & Google Cloud Storage.
Preparation
Before you start, you will need:
- 01 Google account
- 01 licensned Mountain Duck installation
- 01 text editor (in my case, Notepad.exe will be my buddy)
Main content
Create Google Drive OAuth Client
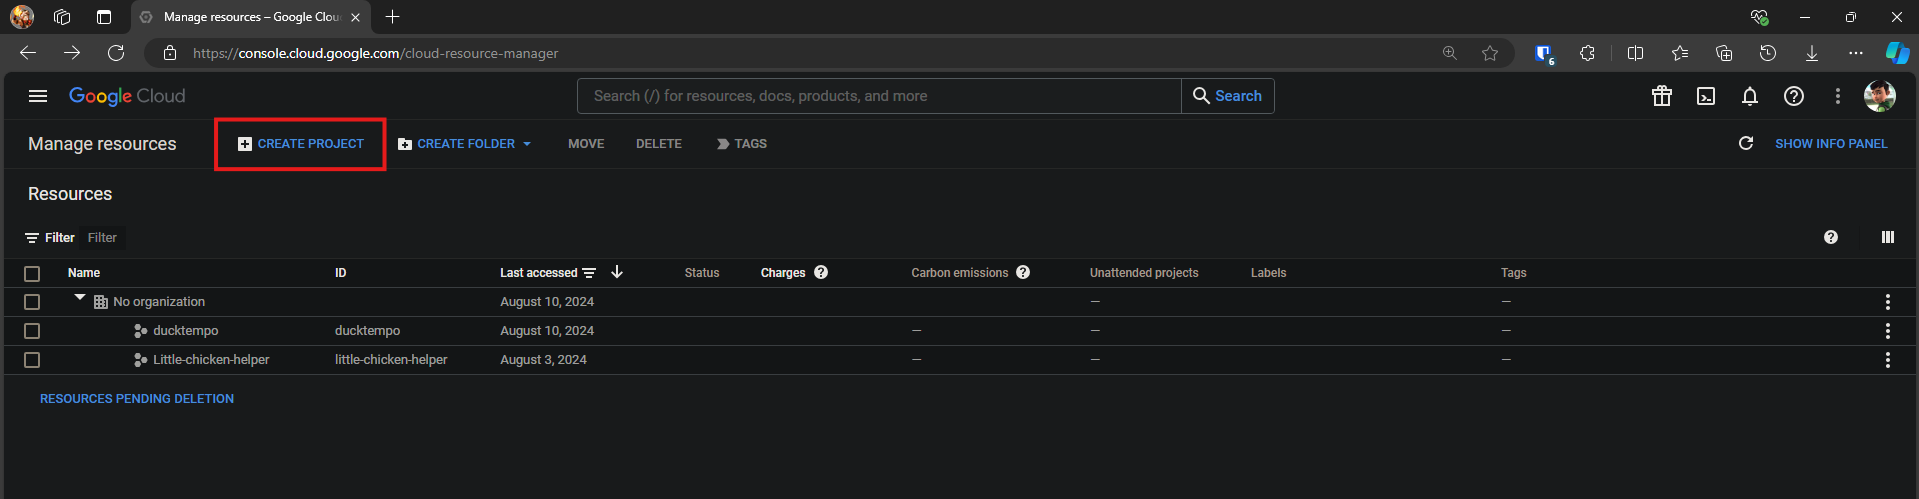
Firtstly, we need to log in our Google account, access Google Cloud resource manager and select Create Project.
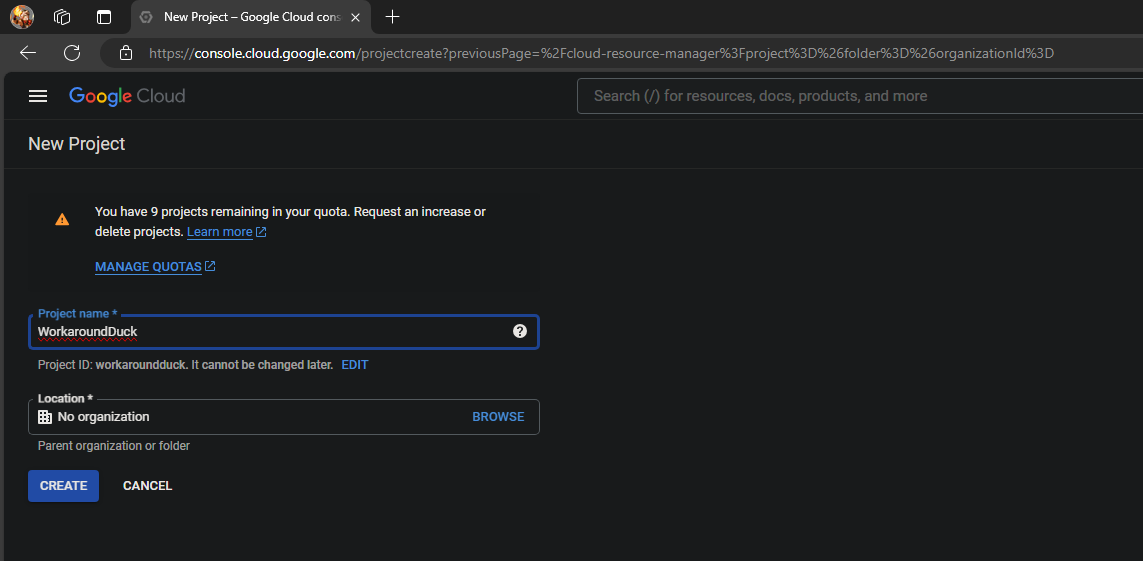
Provide the name of the project, for example WorkaroundDuck.
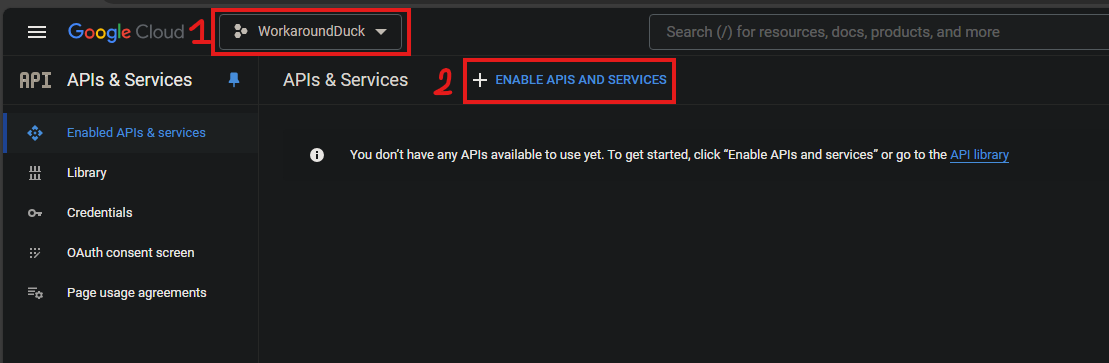
Wait for a few moments, then navigate to APIs & Services
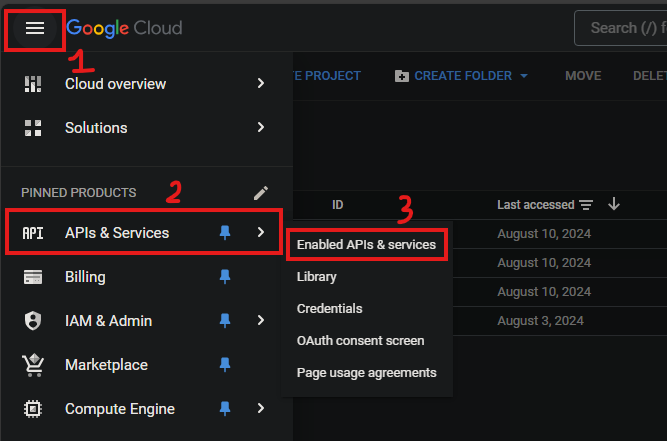
Remember to select your project then click on Enable APIs and Services.
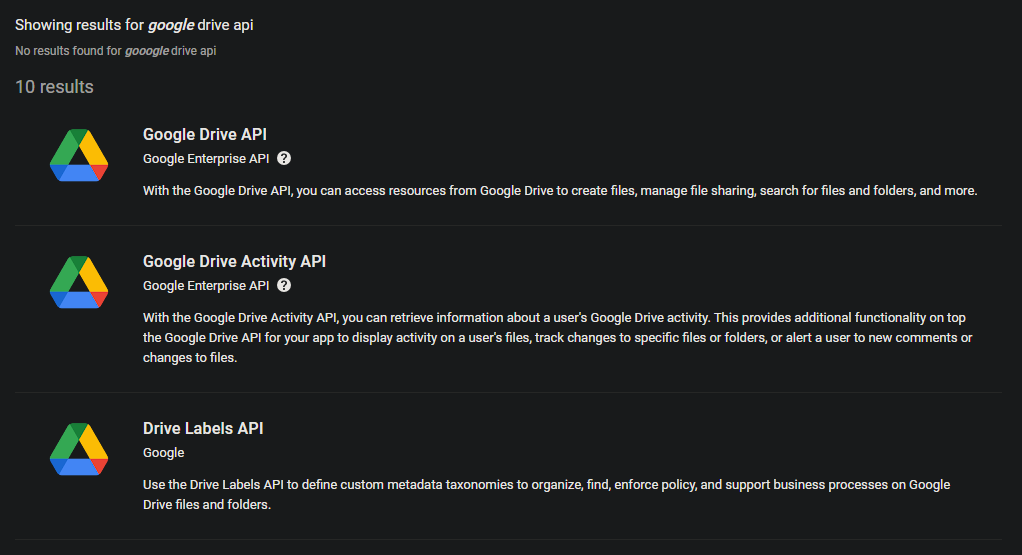
Here, type Google Drive API in the search box, we will have 03 results that have Google Drive logo.

Select Google Drive API, then select Enable.
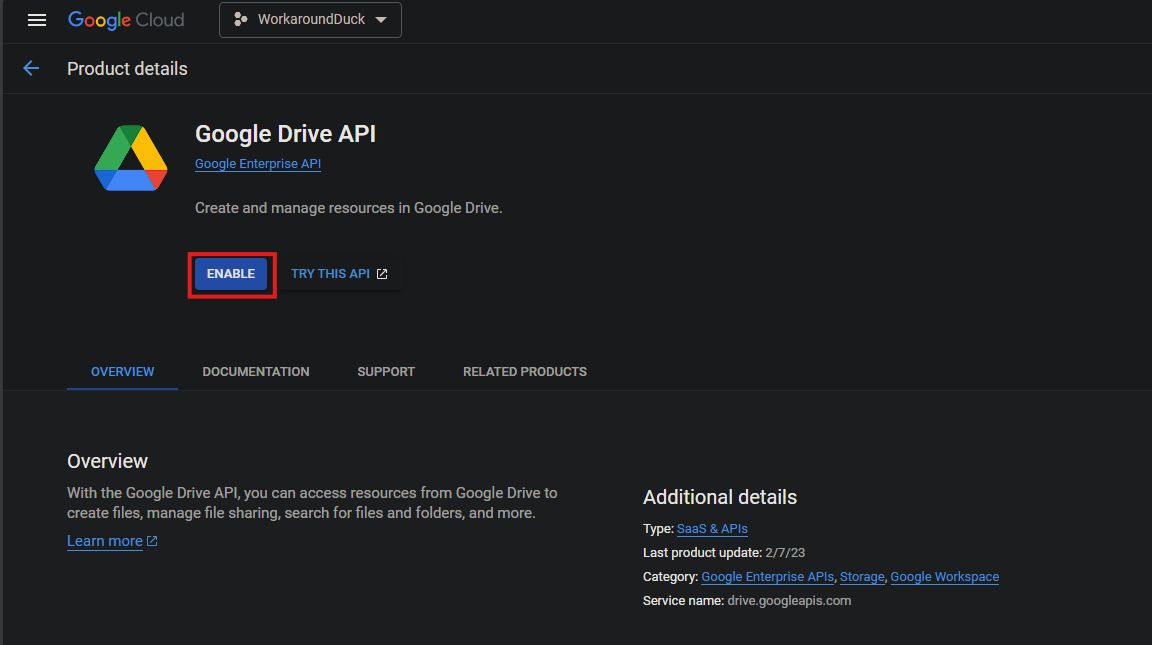
Repeat with Google Drive Activity API and Drive Labels API.
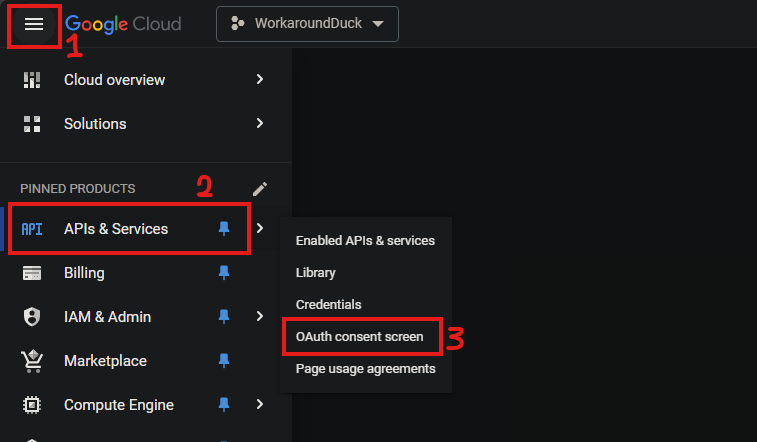
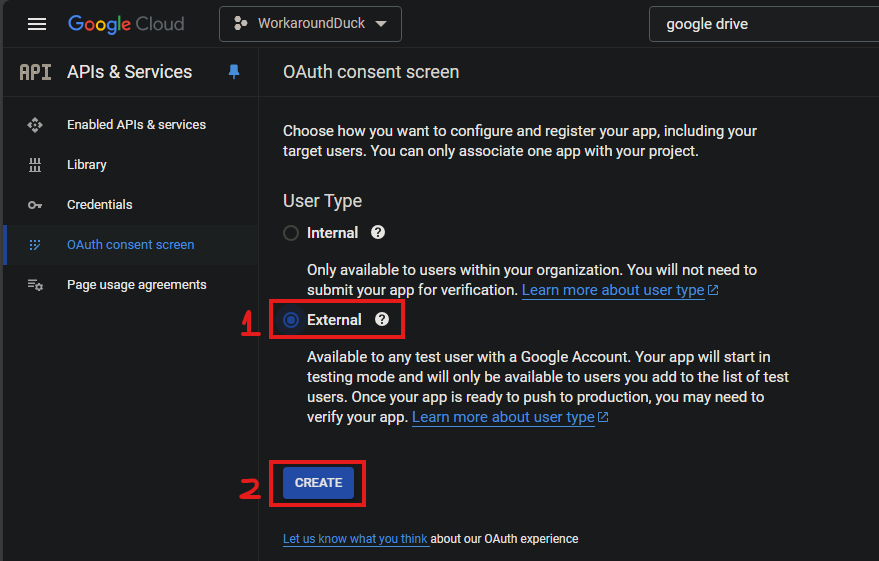
Now, navigate to OAuth consent screen
Select External then Create.
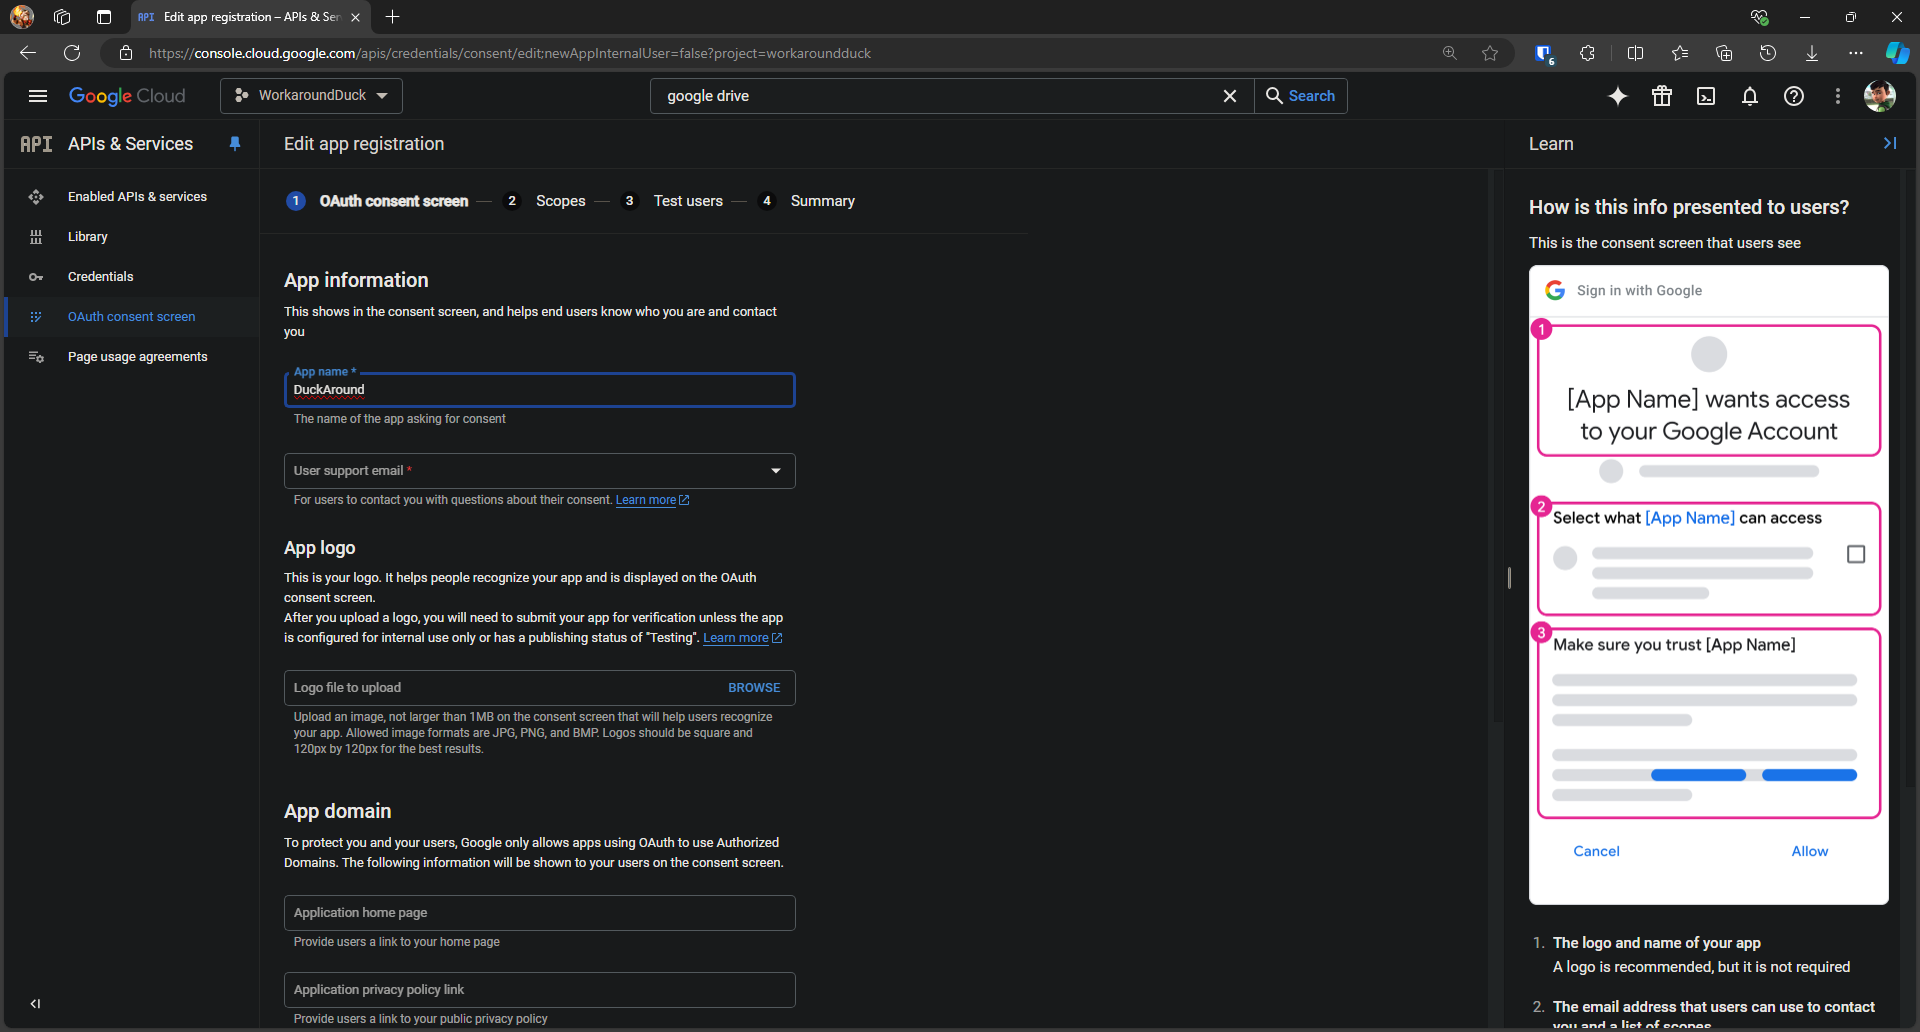
Fill in the required fields, use your own gmail addresses, then select Save and Continue.
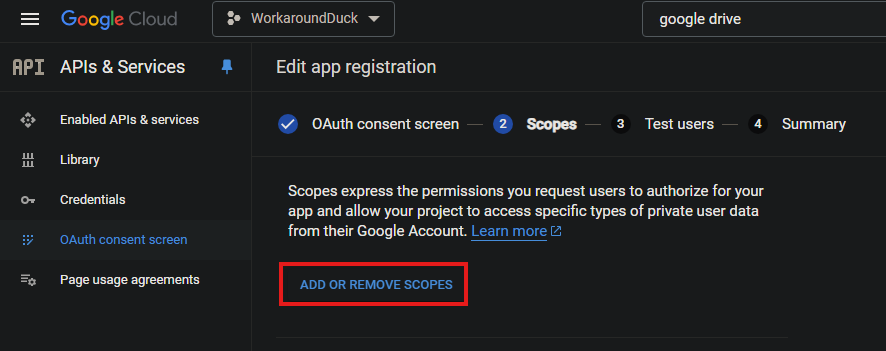
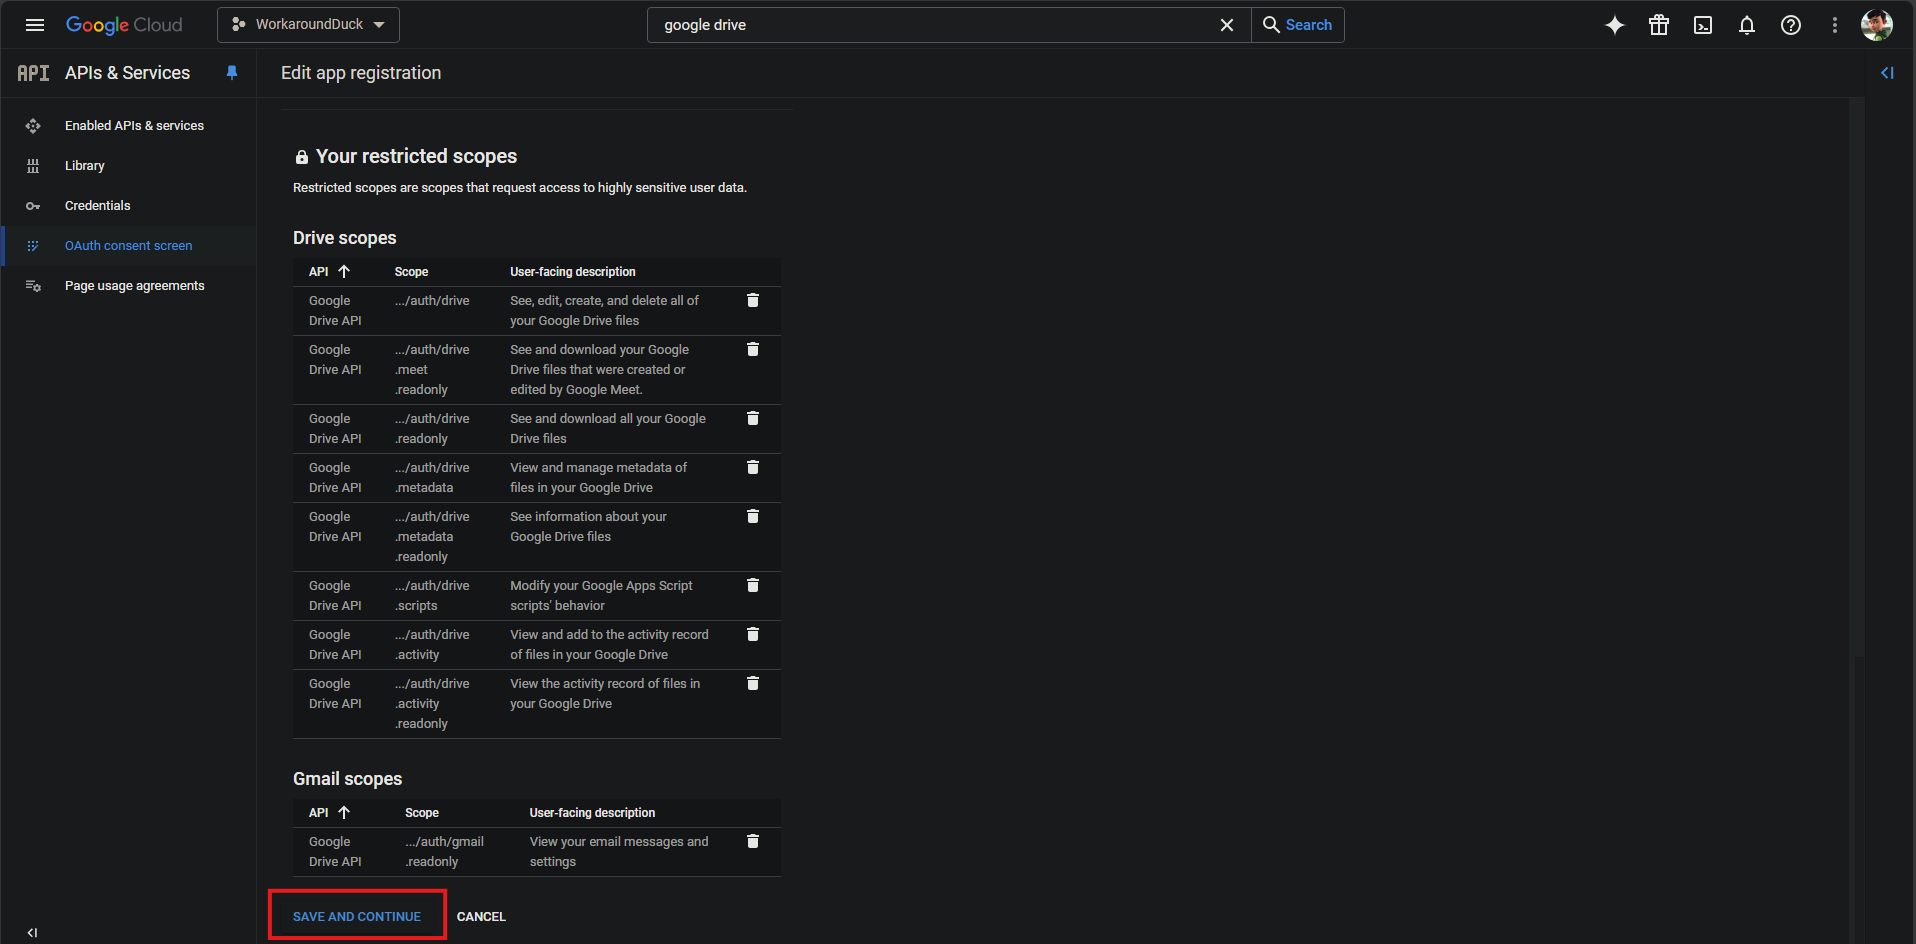
Now, select Add or Remove Scopes.
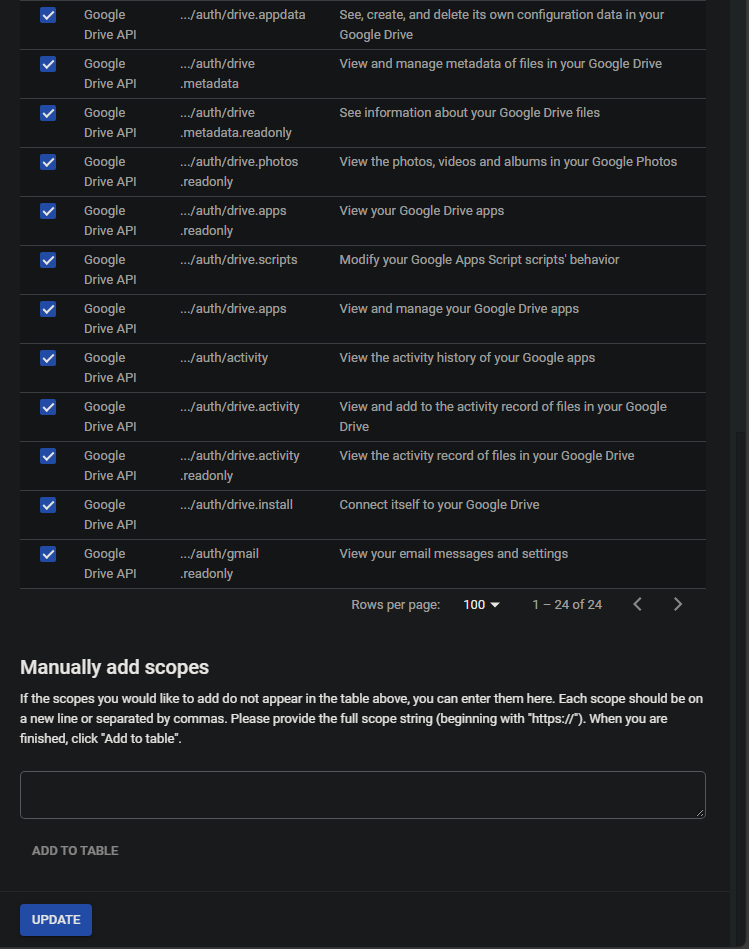
Select everything in the list, then Update.
After that, Save and Continue.
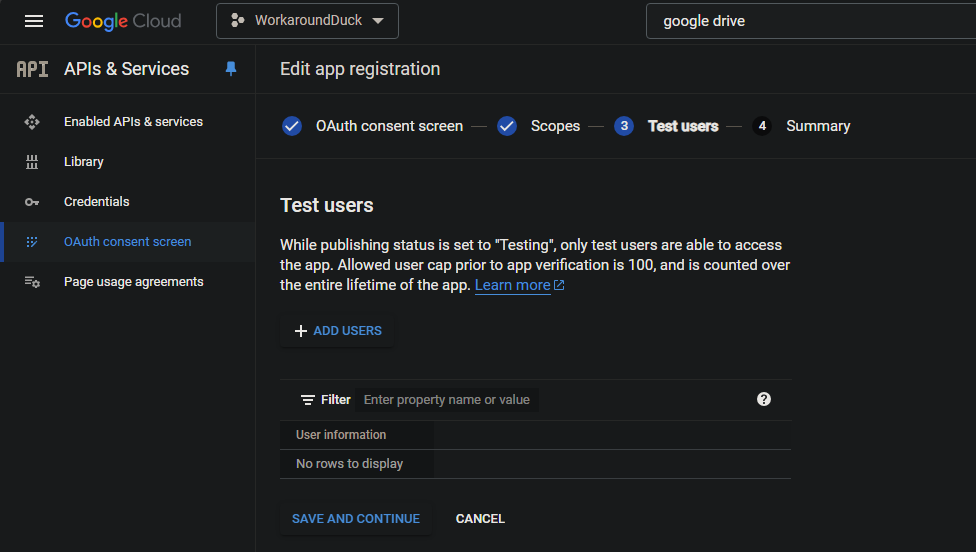
Now, select Add Users then add your primary, 2nd, 3rd, 4th, … gmail addresses.
Don’t forget to add your own address
With this, you don’t need to create different OAuth clients for every g-account. You can add up to
100different addresses.
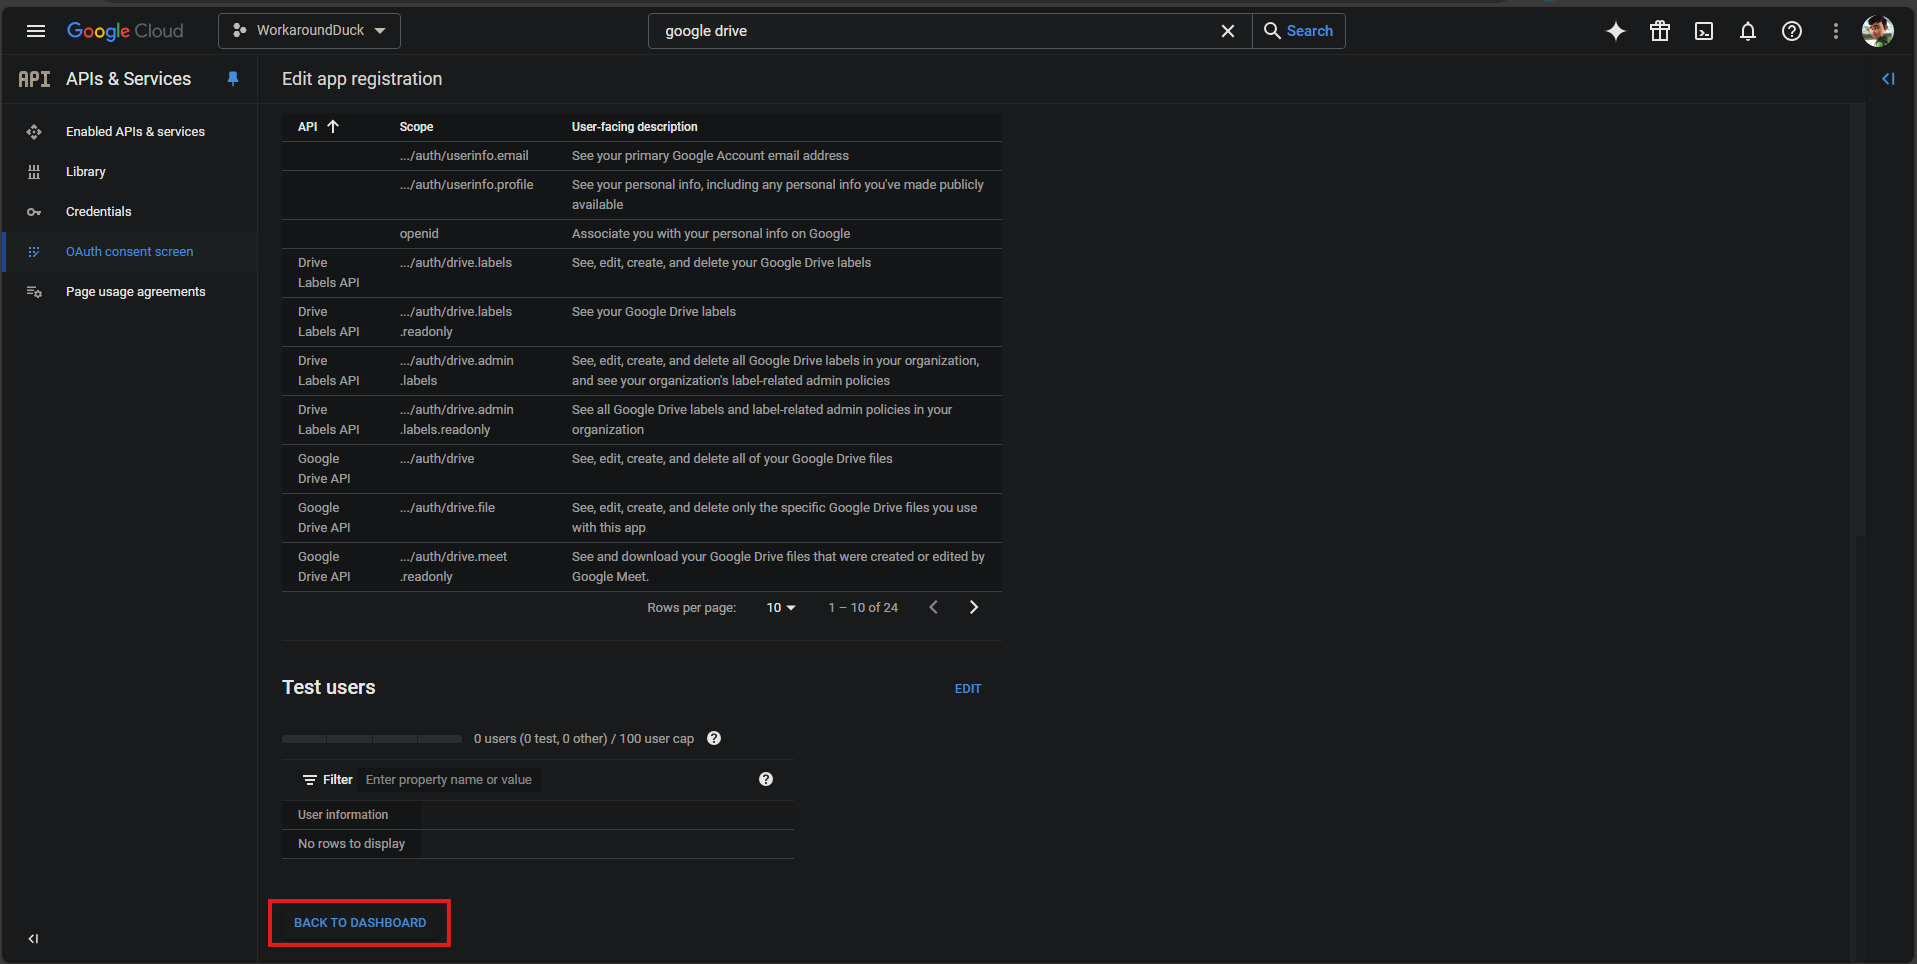
Select Back to Dashboard to finish this step.
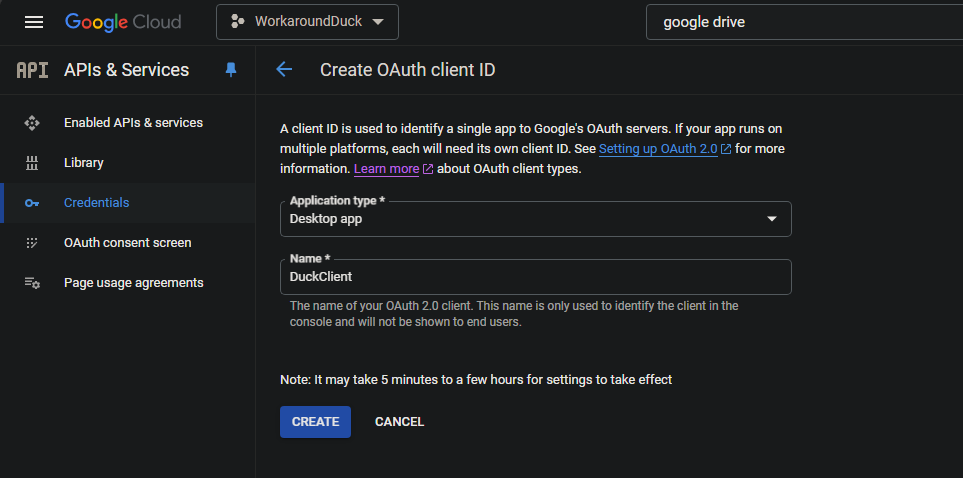
Now, navigate to Credentials, select Create Credentials and OAuth client ID.
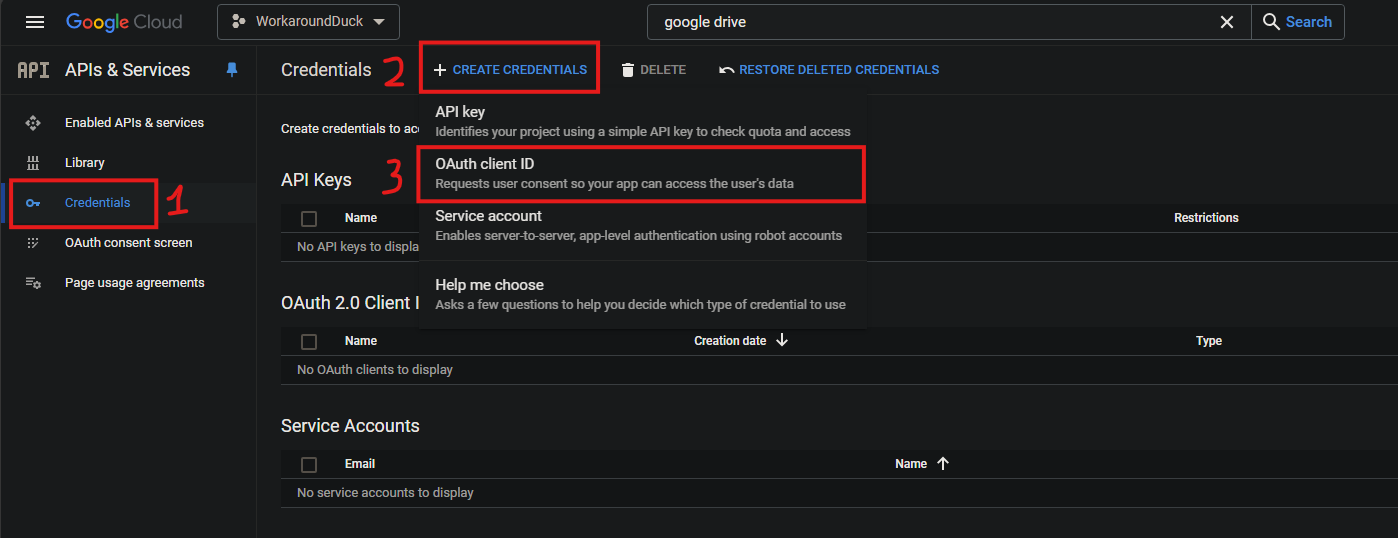
Select Appication type as Desktop app, Name as your preferences, then Create.
Now, you will have Cliend ID and Client secret. Save that for now.
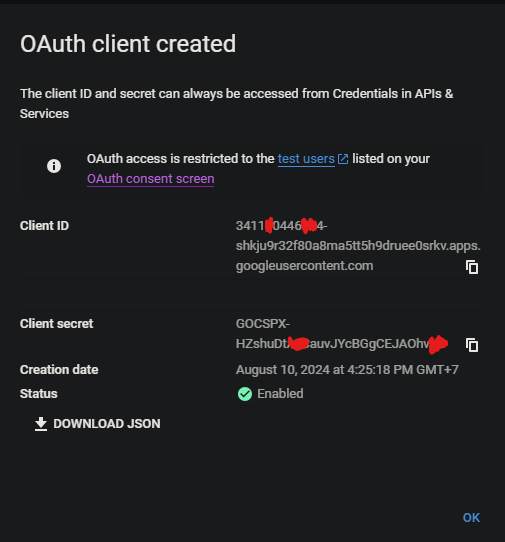
The Client ID has the structure as NUMBER-STRING.apps.googleusercontent.com.
Create Custom Connection Profile
Open the text editor and paste the following lines:
1
2
3
4
5
6
7
8
9
10
11
12
13
14
15
16
17
18
19
20
21
22
23
24
25
26
27
28
29
30

<!DOCTYPE plist PUBLIC "-//Apple//DTD PLIST 1.0//EN" "http://www.apple.com/DTDs/PropertyList-1.0.dtd">
<plist version="1.0">
    <dict>
        <key>Protocol</key>
        <string>googledrive</string>
        <key>Vendor</key>
        <string>googledrive</string>
        <key>Description</key>
        <string>Google Drive Custom OAuth Client ID</string>
        <key>Default Hostname</key>
        <string>www.googleapis.com</string>

        <key>OAuth Authorization Url</key>
        <string>https://accounts.google.com/o/oauth2/auth</string>
        <key>OAuth Token Url</key>
        <string>https://accounts.google.com/o/oauth2/token</string>
        <key>Scopes</key>
        <array>
            <string>https://www.googleapis.com/auth/drive</string>
        </array>
        <key>OAuth Redirect Url</key>
        <string>${oauth.application.identifier}:oauth</string>
        <key>OAuth Client ID</key>
        <string>NUMBER-STRING.apps.googleusercontent.com</string>
	<key>OAuth Client Secret</key>
	<string>CLIENT_SECRET</string>
	<key>OAuth Redirect Url</key>
	<string>com.googleusercontent.apps.NUMBER-STRING:oauth</string>
    </dict>
</plist>
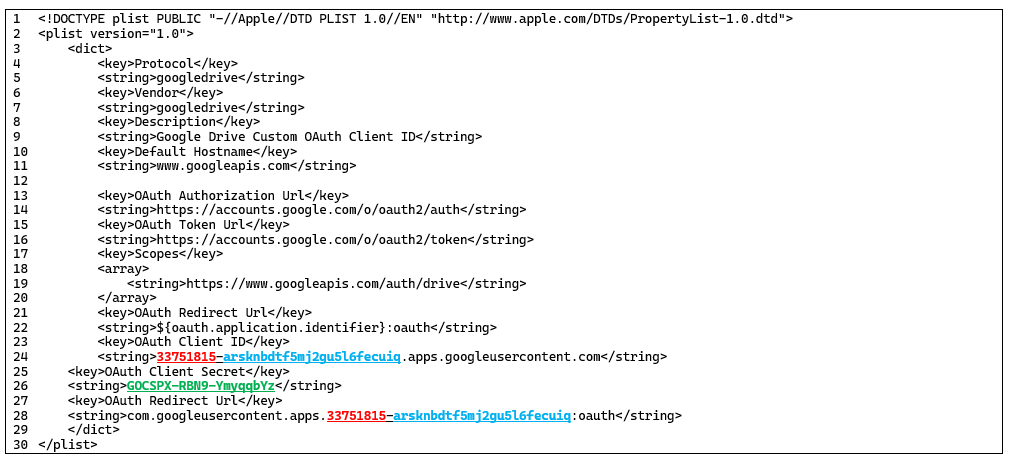
Replace CLIENT_SECRET, NUMBER, STRING with your own credentials from Client ID and Client secret.
The fields you need to edit are:
OAuth Client ID(line24),OAuth Client Secret(line26),OAuth Redirect Url(line28)
Don’t edit any fields from line
22and above !!!
Your file should look like this:
Save the file with the extension .cyberduckprofile

Connect using custom connection profile
Now, double-click the newly created .cyberduckprofile file, then fill in the blanks.
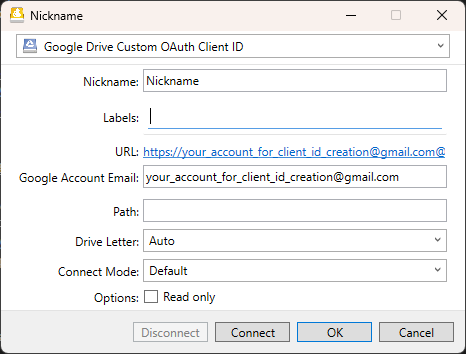
Then, login as usual.
Conclusion
Congratulations, you have reached your custom OAuth client for Google Drive.